Gamecube controller to N64 adapter guide
Introduction
This is a guide for customizing, configuring and updating our Gamecube controller to N64 adapter. For specifications and pricing, please visit the product page.Identifying your version
| Version 2 - Released in October 2015 | Version 1 - Released in August 2011 | ||
|---|---|---|---|
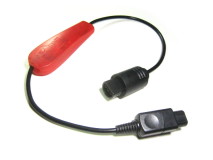
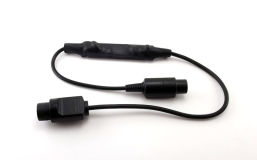
| If your adapter has a plastic casing and look like this, you have version 2. | If your adapter is built into a heat-shrink and looks like this, you have version 1. | ||
 |
 |
Mapping generator
Configuration guide (button sequences/menu navigation)
Flowchart
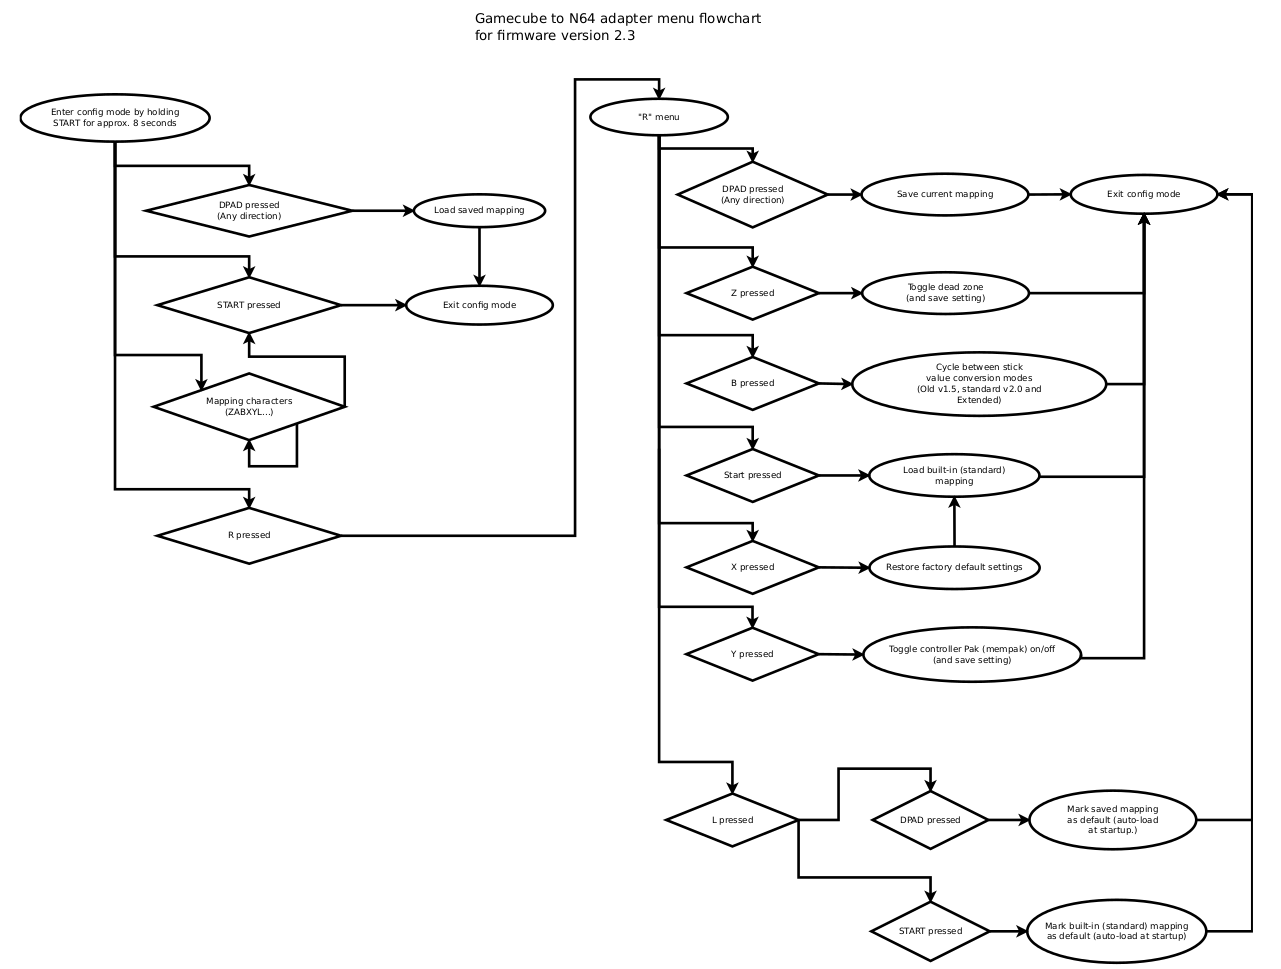
Here is a flowchart convering what is described below. Printing it for reference is recommended!

(click on the image for a larger version)
(click on the image for a larger version)
Entering a mapping code
1) Place the adapter in configuration mode.
With the console turned on with a game running, hold the 'start' button down for approximately 8 seconds. Release once the LED turns on, or on adapters before version 2, after hearing a quick succession of 5 beeps coming from the adapter.
2) Enter the code.
Once in configuration mode, simply press the buttons corresponding to the code.
- After each group ended by the L button, the LED will turn off briefly to confirm. Adapters before version 2 will emit a short beep sound.
- At the end, after the 'start' button has been pressed, the adapter will confirm by blinking twice and returning to game mode (The LED turns off when returning in game mode). Adapters before version 2 emit 3 beeps to confirm and return to game mode.
Saving and recalling mappings
1) Place the adapter in configuration mode.
Follow instructions above.
2A) Saving the current mapping
First press R. Then, press one of the D-pad directions. Each direction can hold a mapping of your choice. After a few seconds, the adapter will blink twice and return to game mode. Adapters before version 2 will confirm the save by emitting 3 short beeps.
2B) Loading a mapping
Upon entering configuration mode, press the D-pad direction associated with the mapping you wish to load. The adapter will load and enable the mapping and confirm by blinking twice before returning to game mode. (Adapters before version 2 will emit 3 consecutive beeps to confirm).
Note: If no mapping is stored in the selected D-pad direction, the adapter will signal an error (see below) and exit to game mode.
2C) Loading the default (built-in) standard 1:1 mapping
Upon entering configuration mode, firs press R, then press START.
Choosing the default mapping
1) Using a saved mapping
In configuration mode, first press R, then press L. Then press the D-pad direction corresponding to the mapping you want to be active at power up.
2) Using the default (built-in) standard 1:1 mapping
In configuration mode, first press R, then press L. Then press START.
Note: The default mapping feature is available since firmware version 1.5.
Other configuraton options
1) Toggling the dead-zone feature (since version 1.3)
The adapter can generate a deadzone (feature diabled by default). This is required for some gamecube controllers that do not always recenter exactly at 0,0 and depending on the game, this can cause issues.
To toggle this feature on and off, enter configuration mode and press R followed by Z. Wait a few moments and the adapter will confirm the change by blinking twice and returning to game mode. (Adapters before version 2 will confirm with 3 consecutive beeps).
2) Cycling through joystick value conversion modes (since version 2.0)
It is possible to cycle through different types of conversions, in this order:
3) Reset adapter to factory defaults (since version 2.0)
To erase all stored mappings and restore all settings to their defaut (eg: Dead-zone), enter configuration mode, then press R, followed by X. Wait a few moments and the adapter will confirm the change by blinking twice and returning to game mode.
4) Toggle the built-in controller pak (memory card) (since version 2.3)
To disable (if currently enabled) or enable (if currently disabled) the built-in controller pak, enter configuration mode, then press R, followed by Y. Wait a few moments and the adapter will confirm the change by blinking twice and returning to game mode.
The adapter can generate a deadzone (feature diabled by default). This is required for some gamecube controllers that do not always recenter exactly at 0,0 and depending on the game, this can cause issues.
To toggle this feature on and off, enter configuration mode and press R followed by Z. Wait a few moments and the adapter will confirm the change by blinking twice and returning to game mode. (Adapters before version 2 will confirm with 3 consecutive beeps).
2) Cycling through joystick value conversion modes (since version 2.0)
It is possible to cycle through different types of conversions, in this order:
- V2.0 style (default)
- Extended mode (V2.1 only, very sensitive)
- Old v1.5 style (less sensistive diagonals).
3) Reset adapter to factory defaults (since version 2.0)
To erase all stored mappings and restore all settings to their defaut (eg: Dead-zone), enter configuration mode, then press R, followed by X. Wait a few moments and the adapter will confirm the change by blinking twice and returning to game mode.
4) Toggle the built-in controller pak (memory card) (since version 2.3)
To disable (if currently enabled) or enable (if currently disabled) the built-in controller pak, enter configuration mode, then press R, followed by Y. Wait a few moments and the adapter will confirm the change by blinking twice and returning to game mode.
In case of error
At any time, if an error occurs (Attempt to load a mapping from a free D-pad direction, error while entering the code, etc), the adapter will blink 10 times and return to game mode.
(Adapters before version 2 will produce 4 beeps (3 short followed by one long) and return to game mode.)
Firmware update procedure
Adapter version 2 has a firmware update feature. Ultimately there will be two ways to update the firmware, as described below.Special N64 rom (GC to N64 adapter manager)
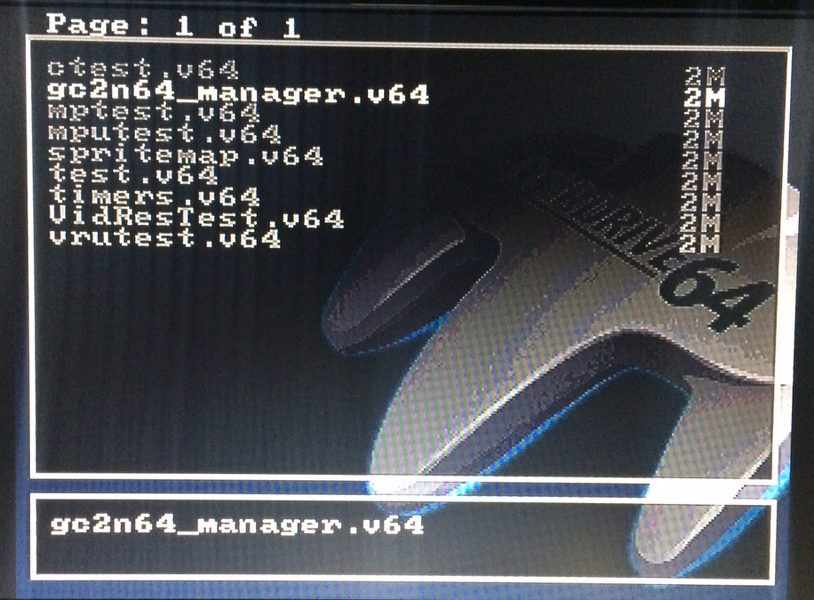
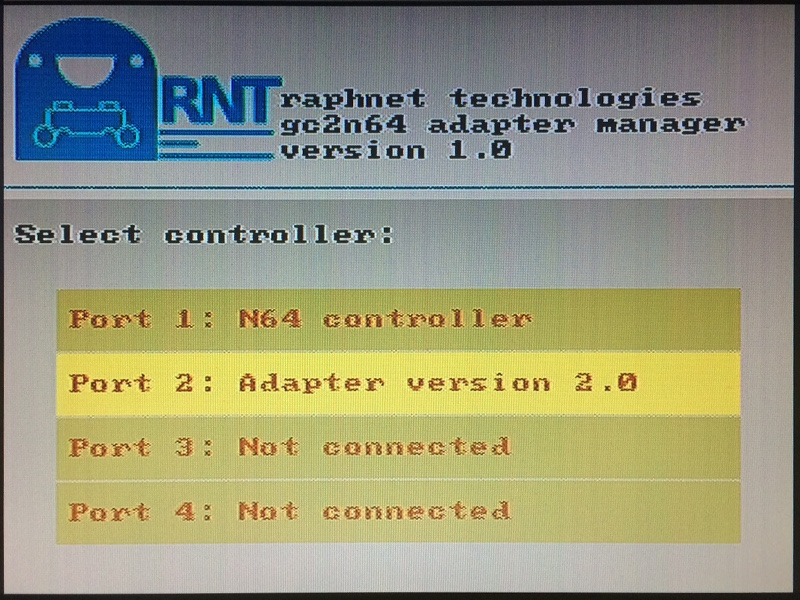
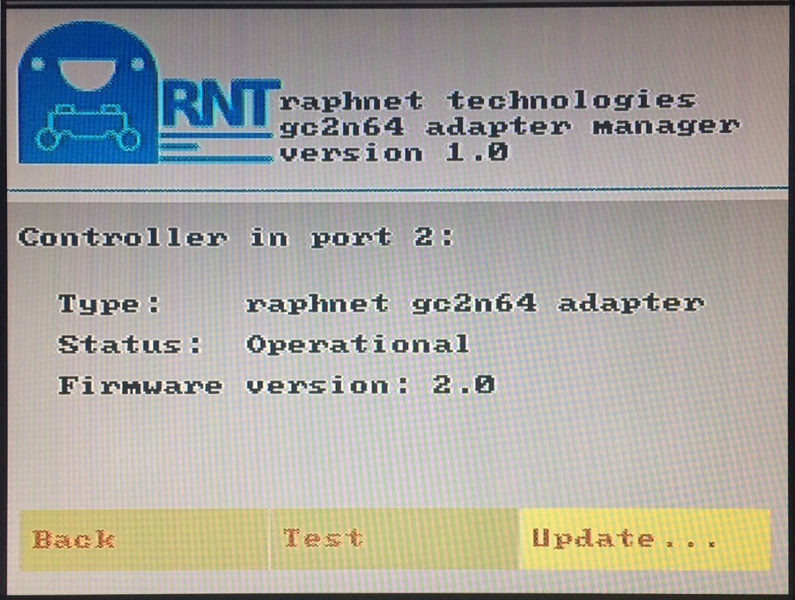
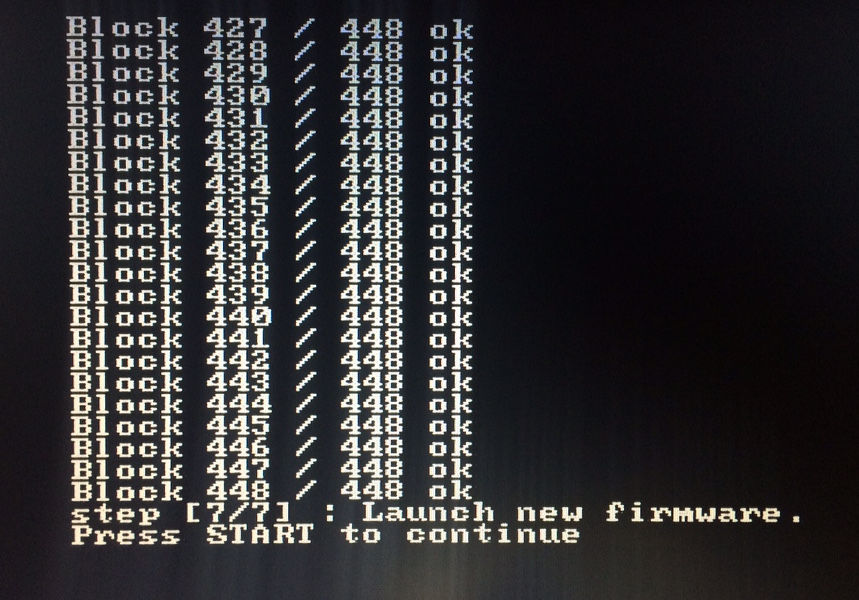
If you have a reprogrammable N64 cartridge, you can load our N64 adapter manager ROM on it to test controllers and update your adapter. The ROM is updated after each firmware
release and features a firmware selection menu allowing you to upgrade/downgrade at will. A simple controller test is also included.
See the N64 adapter manager page for downloads and additional information.
Picture Gallery:
See the N64 adapter manager page for downloads and additional information.
Picture Gallery:
|
ROM in Everdrive64 |
Main menu |
Controller information screen |
Firmware selection for update |
Firmware update |
Controller test |


Through our next generation GC/N64 to USB adapter
Firmware updates can also be performed through a raphnet
3rd generation Gamecube/N64 controller to USB adapter.
Use the Manage GC to N64 adapter option from the Tools menu in the
Adapter management tool.
Picture Gallery:
Picture Gallery:
|
|
|
